Yes, it has been a while since I wrote anything in this blog, but I have been a little busy!
Let’s see, since my last entry in December 2017, I have:
- dismantled Lambing Flat and moved house
- got divorced
- set up a new household with a new partner and re-erected Lambing Flat in a new configuration!
Do you think that might be a reasonable explanation for the lack of entries?
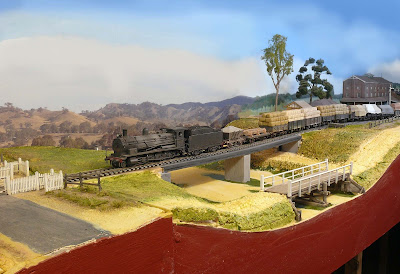
I haven’t been completely idle on the modelling front (other than dismantling and re-erecting a layout!), but I am only going to talk about one project with this post (if you want to see what else I have been up to, just have a look at my Facebook page: https://www.facebook.com/amrmjmes )
Also, the old configuration of the layout at Beecroft was described in my article in AMRM Issue 340 (February 2020), which describes pretty much all the things that I had promised to outline in here, but never got around to. See the AMRM blog for details of that issue and how to acquire it if you haven’t already got a copy.
http://australianmodelrailwaymagazine.blogspot.com/2020/01/february-2020-issue-of-amrm-is-being.html
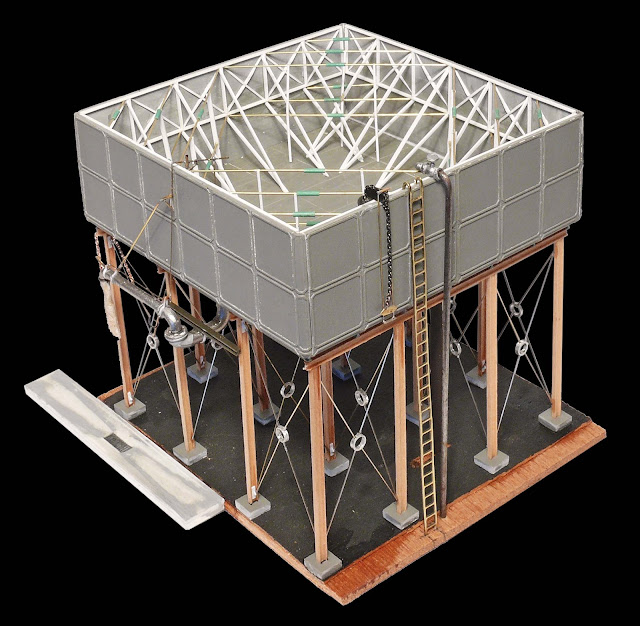
My latest major modelling project is the construction of a standard NSWGR 40,000 gallon cast iron locomotive water tank to serve the rebuilt and enlarged station at Bulla Creek (the location formerly known as New Yard on the old configuration of the layout at Beecroft).
This came about when I was looking in my unbuilt kit drawer for something else, when I rediscovered a treasure I had forgotten I had! It was a Rails North epoxy and timber kit for an NSWGR 40000 gallon water tank and it had been in there since circa 1983! Well, I did need a loco water tank for the reconfigured Bulla Creek, so I started construction.
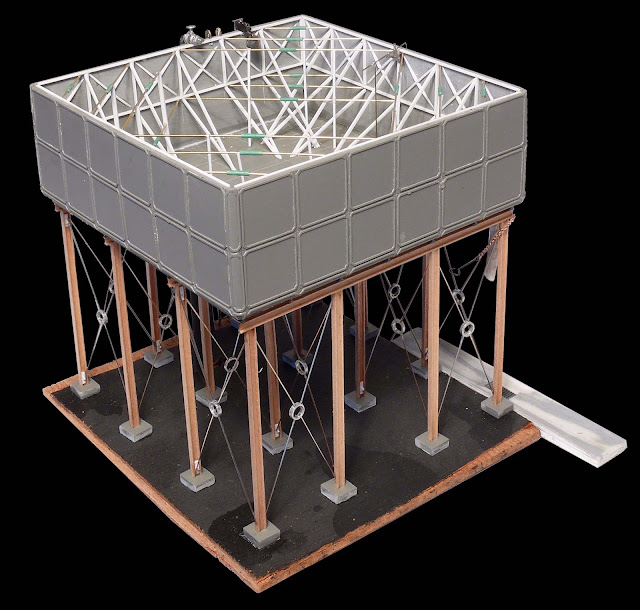
Of course, I didn’t build it as per instructions (the instructions are typical of the era, not all that helpful or accurate!), but instead used the contents of the kit as a collection of parts to help me scratchbuild the version I actually want. I used Peter Jarvis’s excellent articles in AMRM Issues 299 and 300 (April and June 2013) as a guide, as well as various photos and drawings I have access to, particularly images of the tank which once stood at Campbelltown.
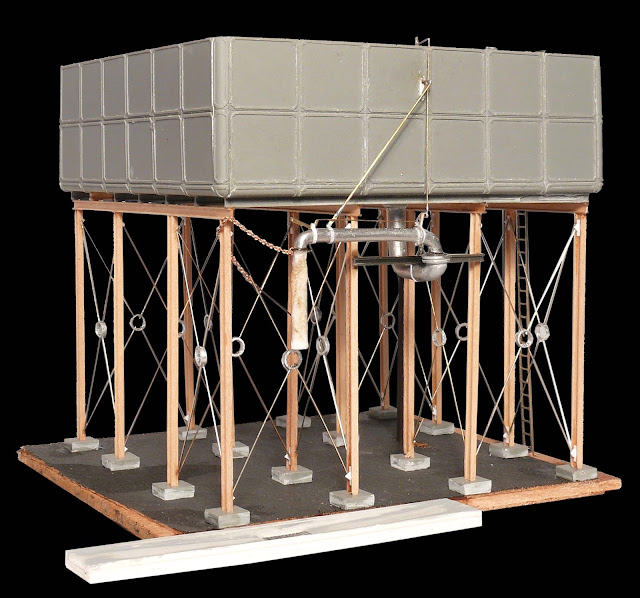
The tank was assembled as designed, but the interior was detailed using Peter’s articles as a guide. The stand was assembled by gluing the components together using a simple set of lines drawn on some spare paper to keep them all square and in line. The wire rigging was some hard nickel silver wire glued to tensioning rings made from aluminium tube and then glued to the legs of the stand.
The water level gauge was constructed from styrene and brass wire, with some chain from the ‘bits’ collection. The ladder was some ladder stock I’ve had in my scrapbox for around 40 years. The inlet pipe was a section of steel bar included in the original kit with a tap fitting from my collection of bits.
The water crane was adapted from a Uneek kit for a standard water column, bending the main column gently to shape to form the ‘U’ shaped outlet pipe. All the linkages to allow the crew to open the water valve from the back of the tender were formed from brass strip and wire, plus some superglue impregnated paper strips to hold it all together. The drain on the ground was formed from styrene sheet and a section of old Lima LV panelling for the grate.
This image shows the rear of the tank and some the detail of the water crane outlet tap linkage and the rear of the water level gauge and the float.
The model is complete and waiting for an opportunity to be painted, which will hopefully happen in the next couple of days. If not, it may take a bit longer, as I will have to get back to working on preparing the August issue of AMRM, which will be my very last issue. Oh, didn’t I mention? I’m retiring at the end of July! The magazine will be in good hands with my replacement being trained up at the moment. If you want to find out who my replacement is, you will have to wait until the June issue of AMRM is released in a couple of weeks!


