Good grief! I’ve managed two posts in the same year!
No particular theme with this one, just a few random shots of models I have completed over the last year or so.

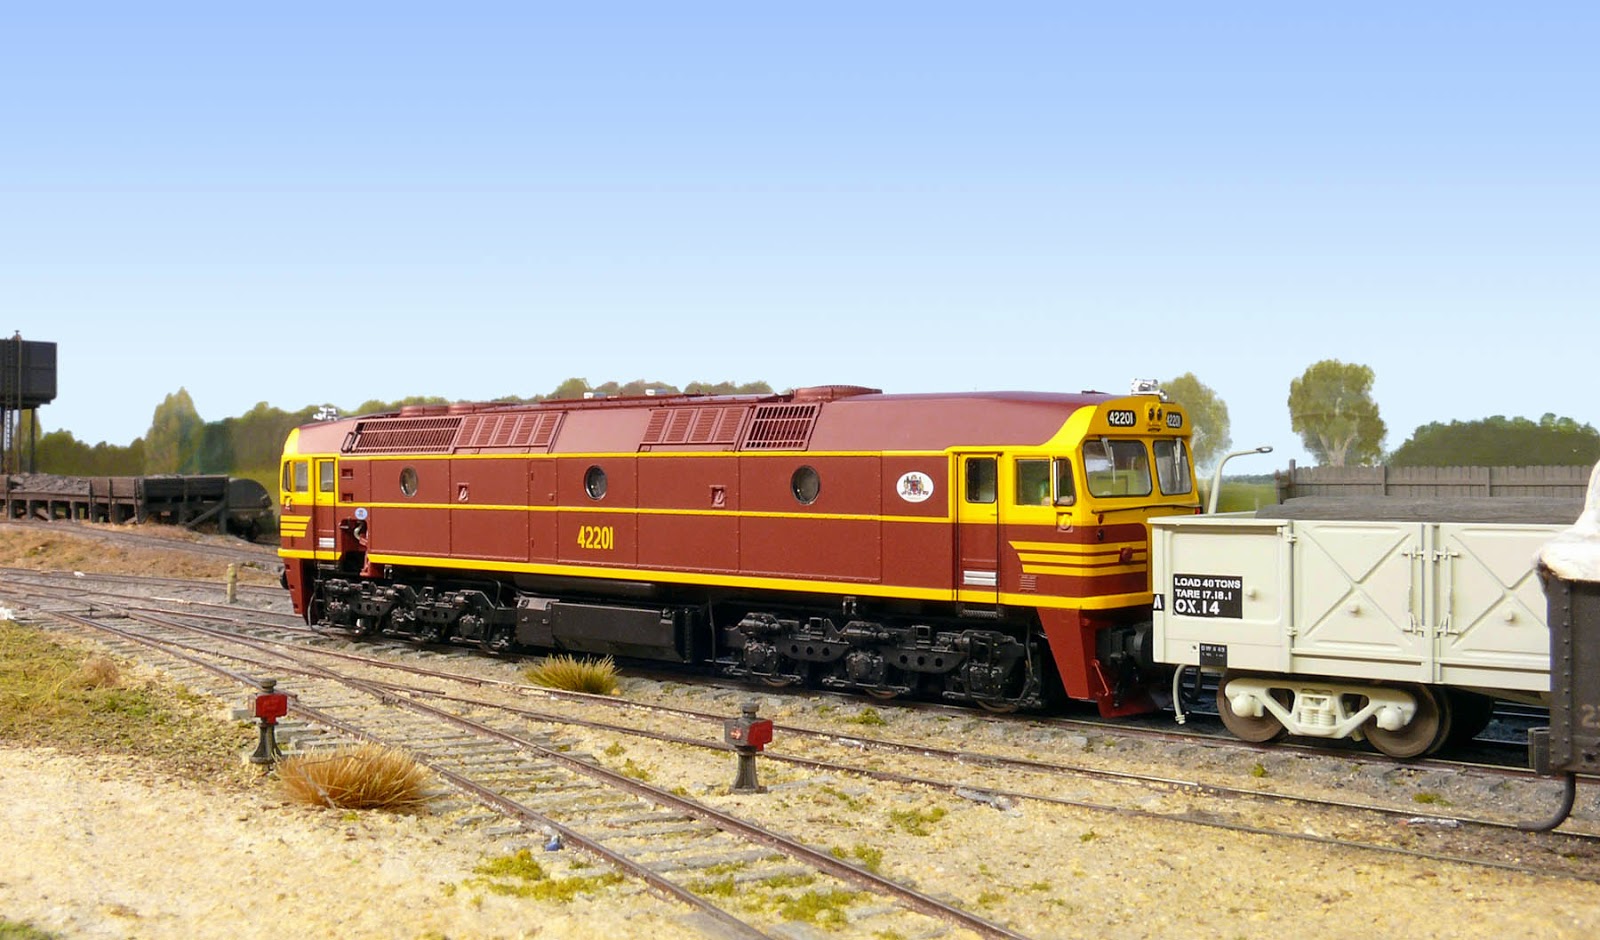
Lambing Flat now has a very modern diesel, an Auscision 422 class. It has been fitted with a Loksound chip loaded with the sound scheme from DCCSounds. It runs and sounds very well. It has not been weathered yet, but will be as soon as I can get around to it. As it is a *very* ‘modern’ engine for Lambing Flat it will only get a very light weathering so it represents the prototype in its first weeks of life. In the meantime, it is very nice listening to the lovely GM growl of one of my very favourite NSWGR diesels.
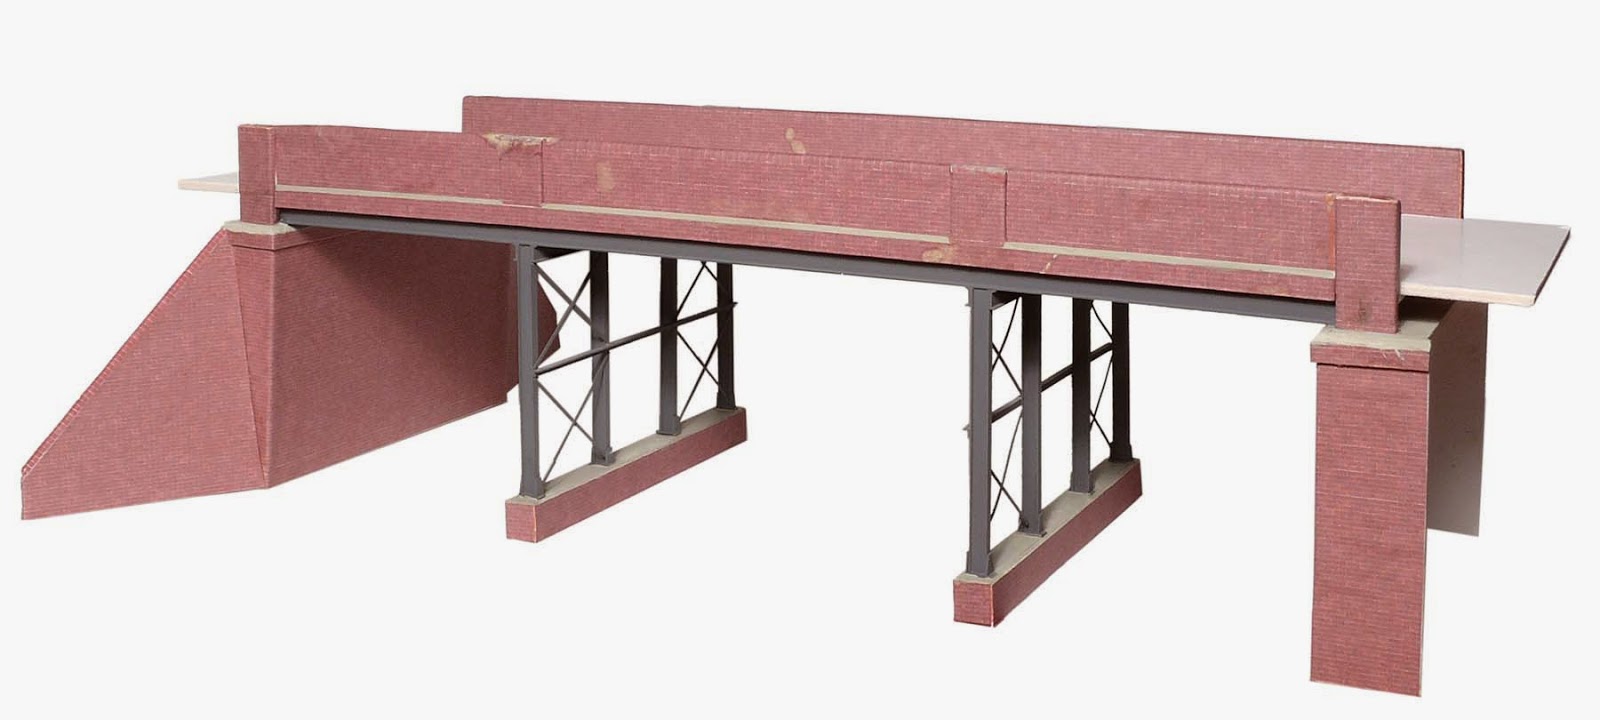
Another project almost completed is this standard NSWGR brick and steel road overbridge.The bridge was built from measurements I took in January 1995 of the road overbridge just south of Jerrawa Viaduct on the NSW Main South line, though the model has been slightly modified to suit the position it will occupy on the layout. The ‘steelwork’ of the bridge was constructed from Evergreen Styrene shapes. The ‘brickwork’ was made by glueing brickpaper over thick card. The brickpaper was downloaded from the Paperbrick site:http://paperbrick.co.uk/ A very useful site indeed! I had originally intended to build the model with correct ‘English Bond’ brickwork and downloaded sample sheets of that bond… however, I also downloaded a sheet of stretcher bond in the same colour… guess which one I printed out when it came time to start construction! I didn’t realise I was using the wrong bond till about halfway through construction, so perhaps it isn’t that noticeable! Now all I have to do is weather it and instal it on the layout.

Some may have read my review of Bragdon Enterprises’ weathering powders printed in the August 2014 issue of AMRM. Here are a couple of different photos of some of the models I weathered for the review. Above is a StructOrama ready-to-place HO scale shed modified from standard (bottom building) to look more like a NSWGR building (top building), in order to house the wagon repair staff and equipment at Lambing Flat’s ‘New Yard’. As befits my period, I resolved to repaint it in NSWGR ‘stone’ colours. First I carefully painted the window frames Tamiya XF-2 Flat White, then did the walls in Tamiya XF-20 Medium Grey. Once that had dried I painted the roof with Tamiya XF-16 Flat Aluminum the window trim, doors, barge boards on the gable ends of the building and the downpipes Humbrol No.62 Leather, which is the closest colour to NSWGR Medium Stone that I have found. Then the inside of the gutters was painted dirty black and the gutters themselves Tamiya XF-10 Flat Brown to represent the NSWGR Dark Stone colour. The edge of the base was painted Tamiya XF-55 Deck Tan to represent the concrete slab the building rests on.
The photo above shows it before weathering, as a comparison with the standard article. Below is the building after weathering with the Bradgon powders..

Below is my Eureka 620/720 class two-car diesel train (not a bloody railmotor, you ignorant Sassenachs! ;), weathered with a little acrylic paint and some Bragdon Enterprises weathering powders. The silver wheel faces were painted brown with a Floquil paint pen and the grills undercoated with Tamiya Matt Black, then the entire train was weathered with the powders. I’m aiming for a fairly clean look (the 620s were fairly new in my timeframe, as well as reasonably well looked after), so I was after a ‘dusty’ look, but not ‘disgusting’! I’m still not completely satisfied though, particularly with the roof and grills (there was no black in the sample pack), but it is definitely a huge improvement over the unweathered version.

I also reweathered my Trainorama 4429, as the acrylic paint weathering applied back in 2005 had started to fade, particularly on the bogies, so I brushed on a quick coat of Grimy Grey Bradgon powder and this is the result. I’m very pleased and quite intrigued at how quickly and easily one gets realistic results with the weathering powders.

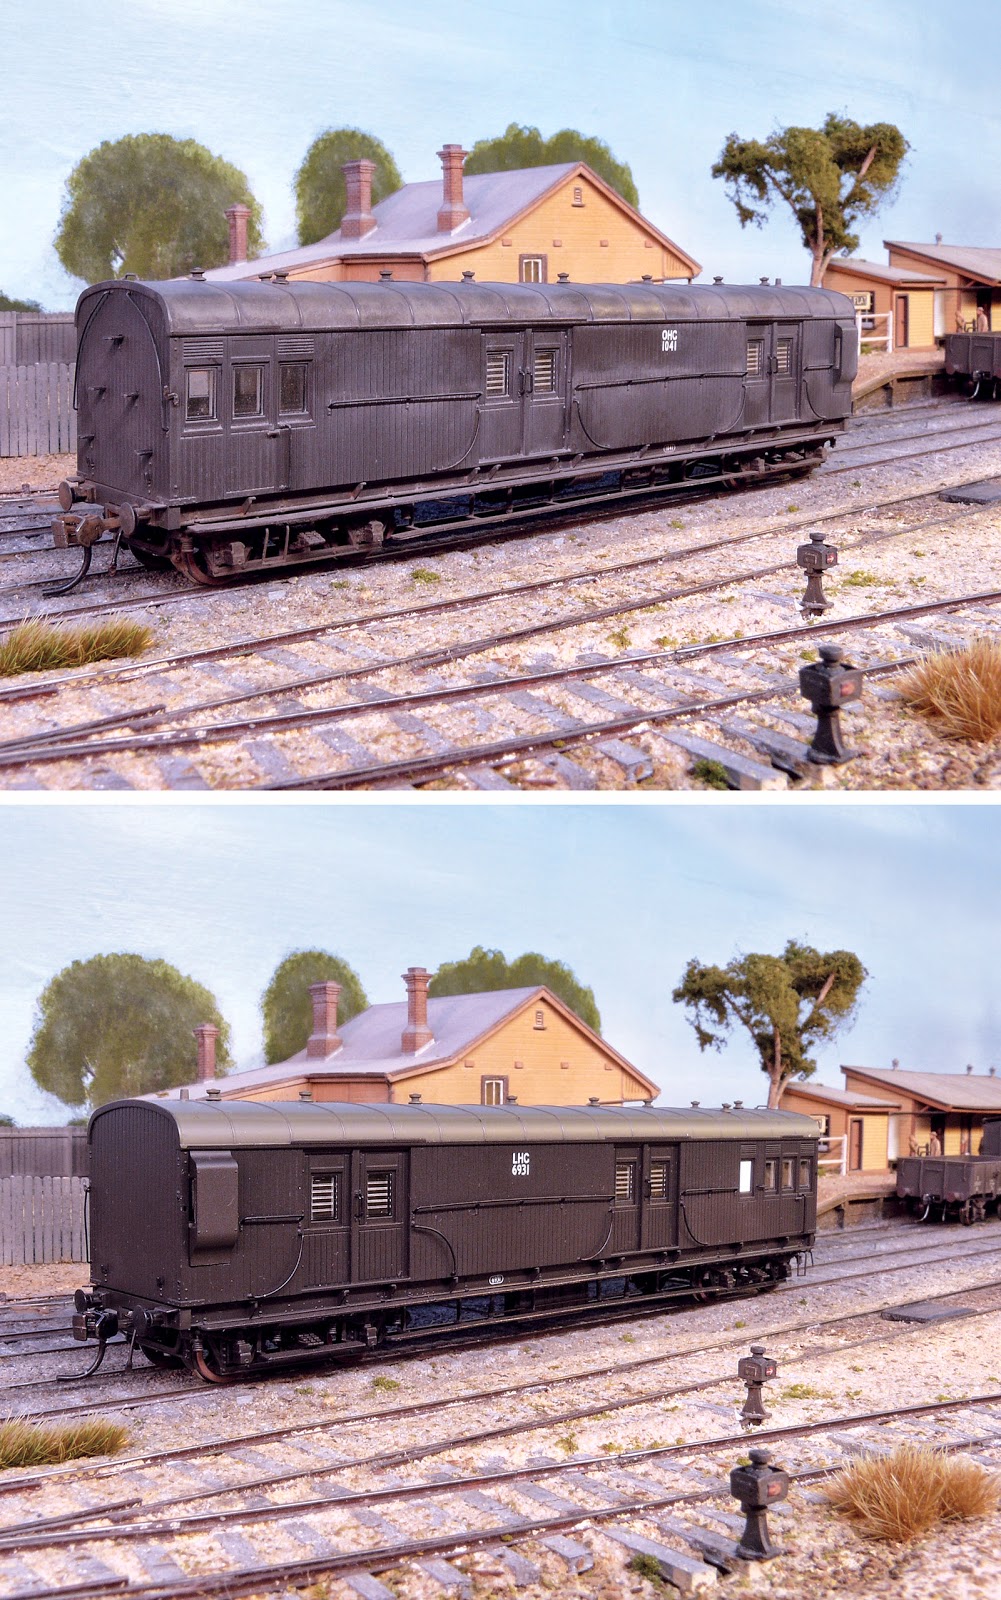
Here is another ‘before and after’ comparison showing two Austrains 48′ goods brakevans. The LHG at the bottom is straight out of the box, except that I have painted the wheel rims brown. The OHG at the top has had the coupler release levers removed (the prototypes were screw coupled), had the wheel rims painted brown, a little dilute acrylic brown ‘washed’ over the underframe and a little brown/black ‘washed’ over the roof to tone it down a bit, while the rest was done with the Bradgon weathering powders.
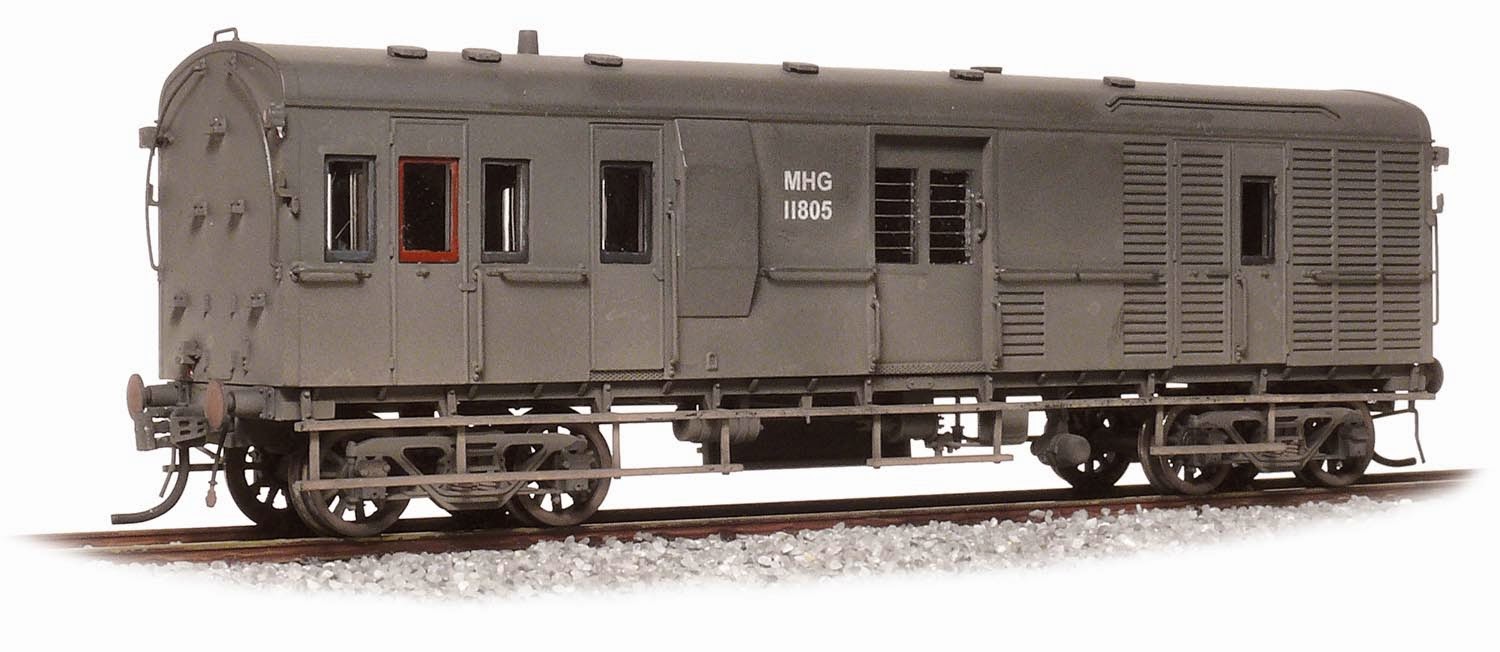
I’m still weathering the ‘old fashioned’ way with acrylic paint. Here are a couple I have completed over the last couple of years. Here is an ‘as delivered’ Trainorama MHG weathered to represent a fairly recently outshopped vehicle, as not everything was decrepit and ready for the knacker’s yard! A light dusting of Tamiya XF-52 Flat Earth and some Aqueous Hobby Color H343 Soot, with some Tamiya XF-10 Flat Brown for the rust has bought up the detail, but kept the vehicle looking relatively clean and new.

This other Traino MHG has been more heavily weathered to represent a vehicle that has been ‘out on the road’ for a much longer period, to the extent that it has suffered a broken window at some stage and had the window frame replaced with an Indian red one from carriage stores, something that was quite common in the 1960s.
I’ve also been madly weathering what seems like boxes and boxes of Austrains four-wheel vans, using my standard diluted acrylic paint methods. Here are just a few examples.


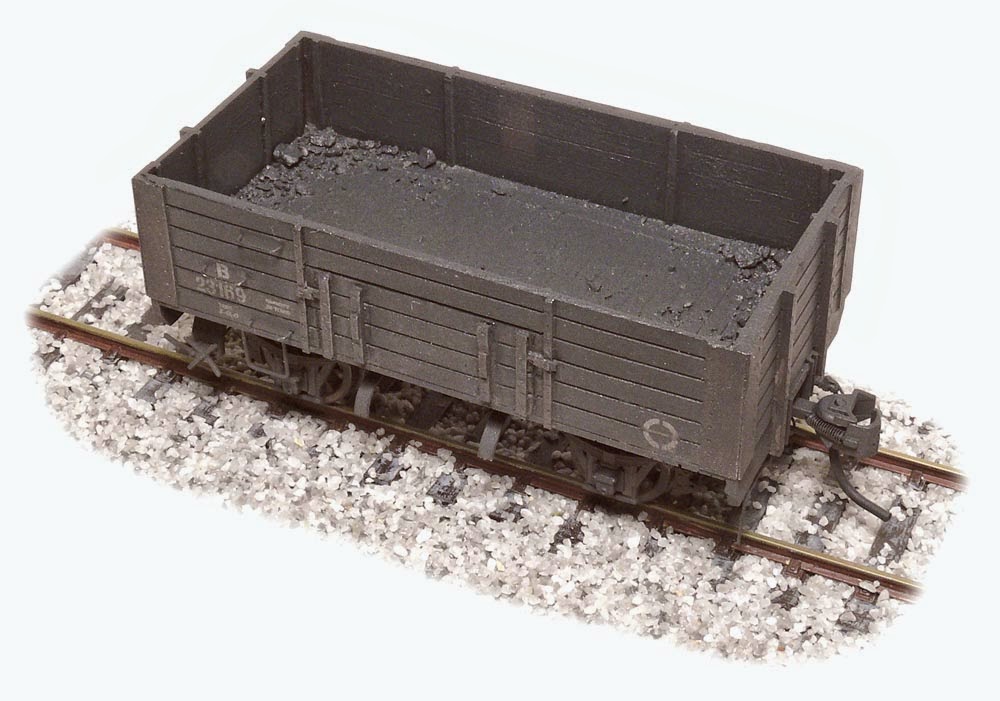
I haven’t just been ‘plonking’, I have also completed a pair of IDR NSWGR B wagon kits. As usual, they aren’t *quite* as the manufacturer intended… I have added uncoupling levers and substituted some much closer to scale door bangs than were provided in the kit. A very nice model and dead easy (and quick) to put together. This one has been weathered and I’ve also added a little ‘left over’ coal to the interior for when it is running empty.
Infrastructure hasn’t been neglected either. This is a close up of the signal box at Back Creek Jct seen in an earlier post. The box was constructed from a Stephen Johnson urethane kit I have had salted away for about 20 years, with the platform scratchbuilt from timber. The box nameboard was assembled in Photoshop and then printed out.
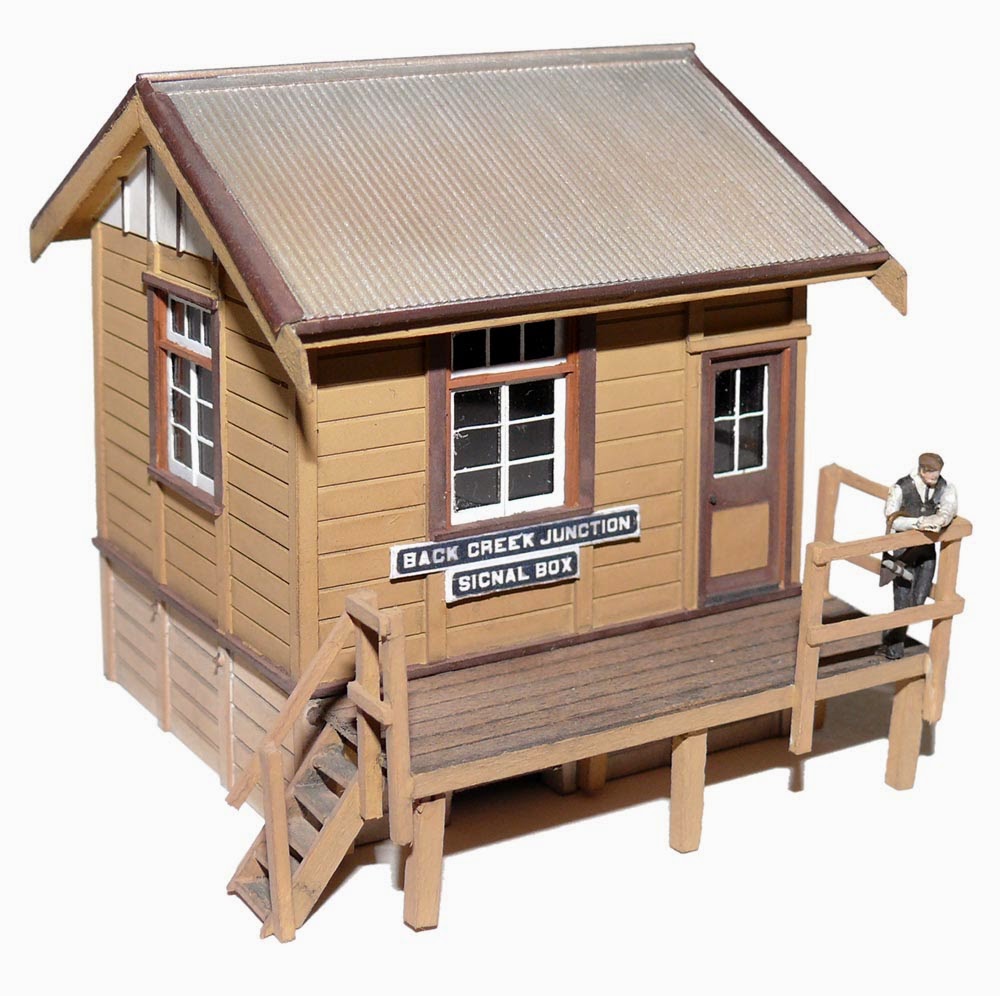
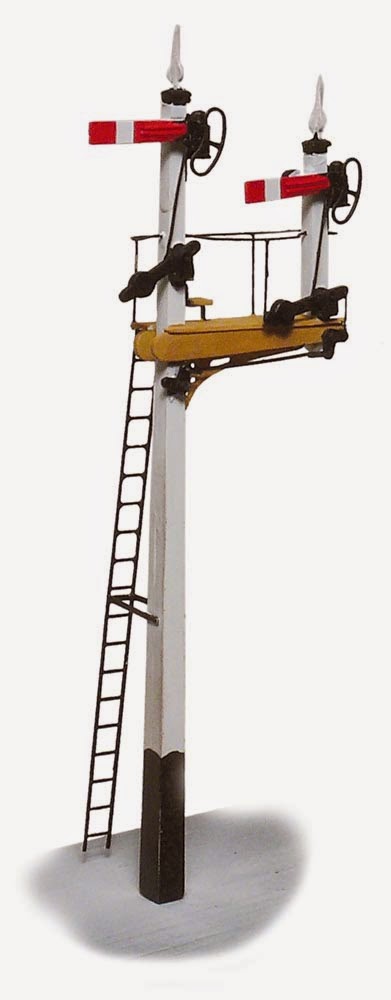
The junction signal for Back Creek Junction was kit-bashed from a combination of old Ratio GWR posts and balance weights, modified Casula etched brass signal arms, home cast whitemetal finials (from self constructed masters, no pirating here! ), Uneek etched brass ladder and the rest scratchbuilt. It is based on drawing of a standard Byles era bracket signal.
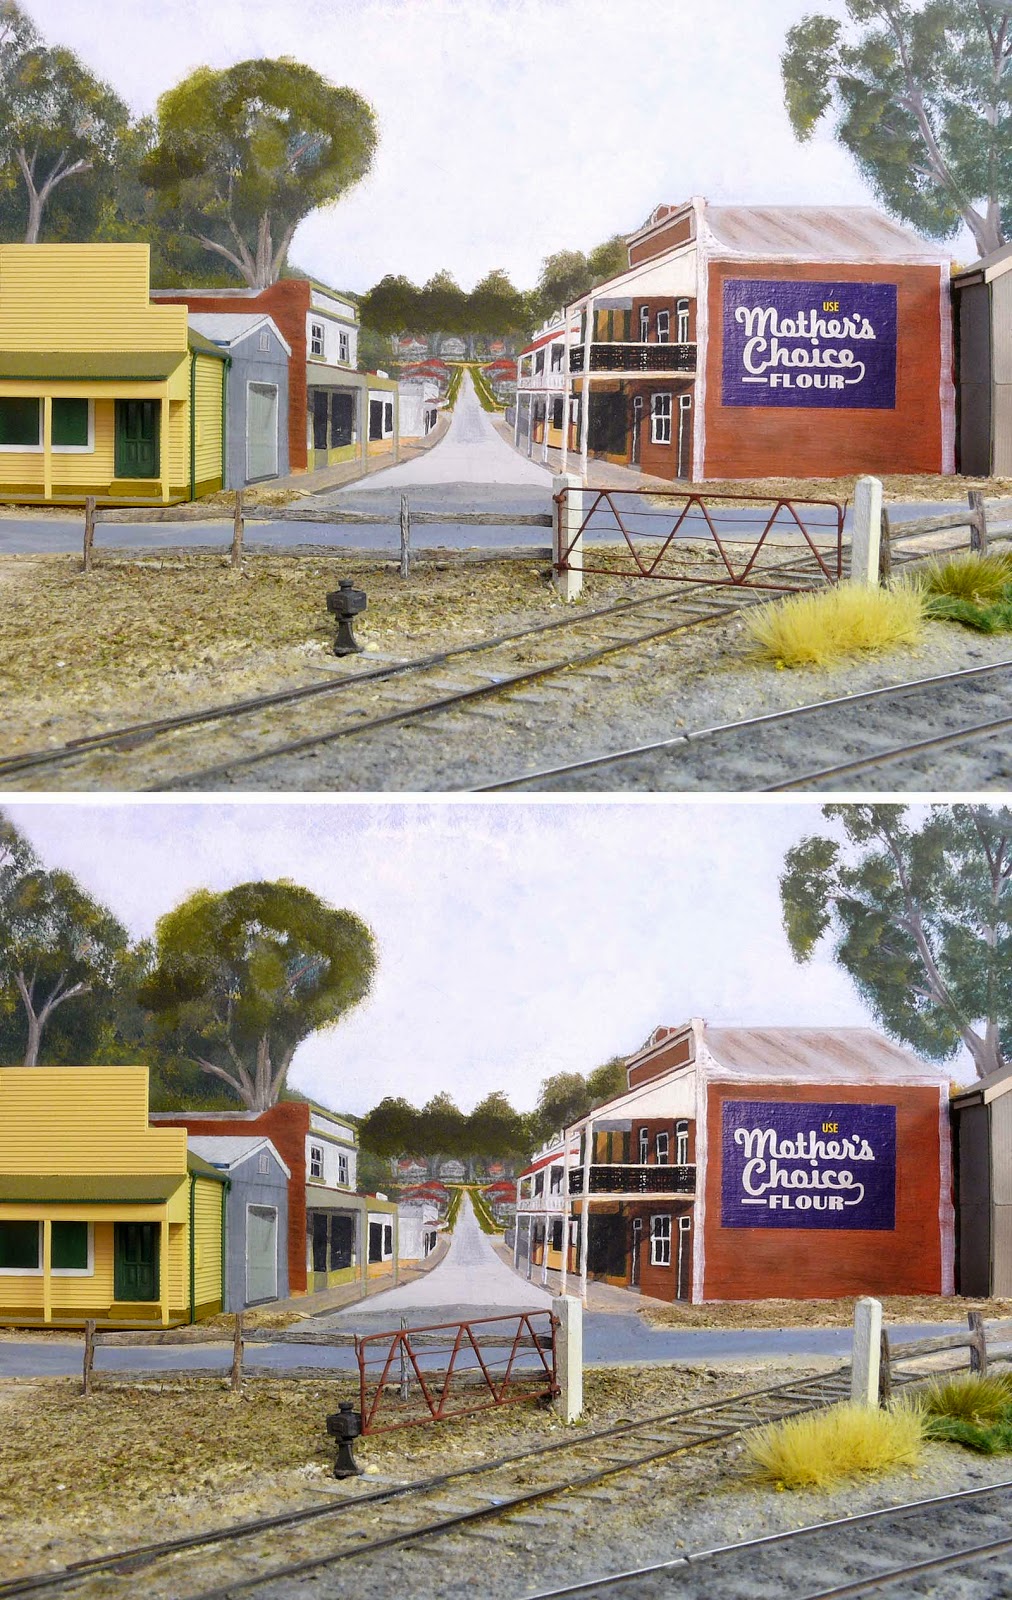
Every now and then a small detail item gets added to the layout. After twenty years or so of unfettered access to the railway reservation where the private siding to the Co-op cool stores leaves the main line, a gate has been provided. I scratchbuilt the standard NSWGR pipe gate in brass wire about 10 years ago, undercoated it about two years ago and finally painted and weathered a couple of weeks ago! The standard colour scheme for gates at private level crossings and private sidings was a red colour, but I have never seen one in ‘pristine’ condition, the ones I saw were always dull, dirty and rusty, so the model was finished accordingly. It is hinged and is openable.
There seems to be a bit of a theme developing here… of projects that take decades to complete! I recently rediscovered an old Vacey Ash (Biltezi) card kit for a British 4mm scale church that I purchased back in the late 1970s. The price tag on it was $1.00! I originally purchased it because it resembled the sort of Gothic revival churches erected in Australia in the 19th century. It was built pretty much as the designer intended, as I will use it as a ‘background’ building, however, the flat, printed ‘slate’ roof was extremely unconvincing, so I covered it with some corrugated card and then scratchbuilt bargeboards and gutters. The slightly ‘wonky’ bell tower is down to a certain giant cat…

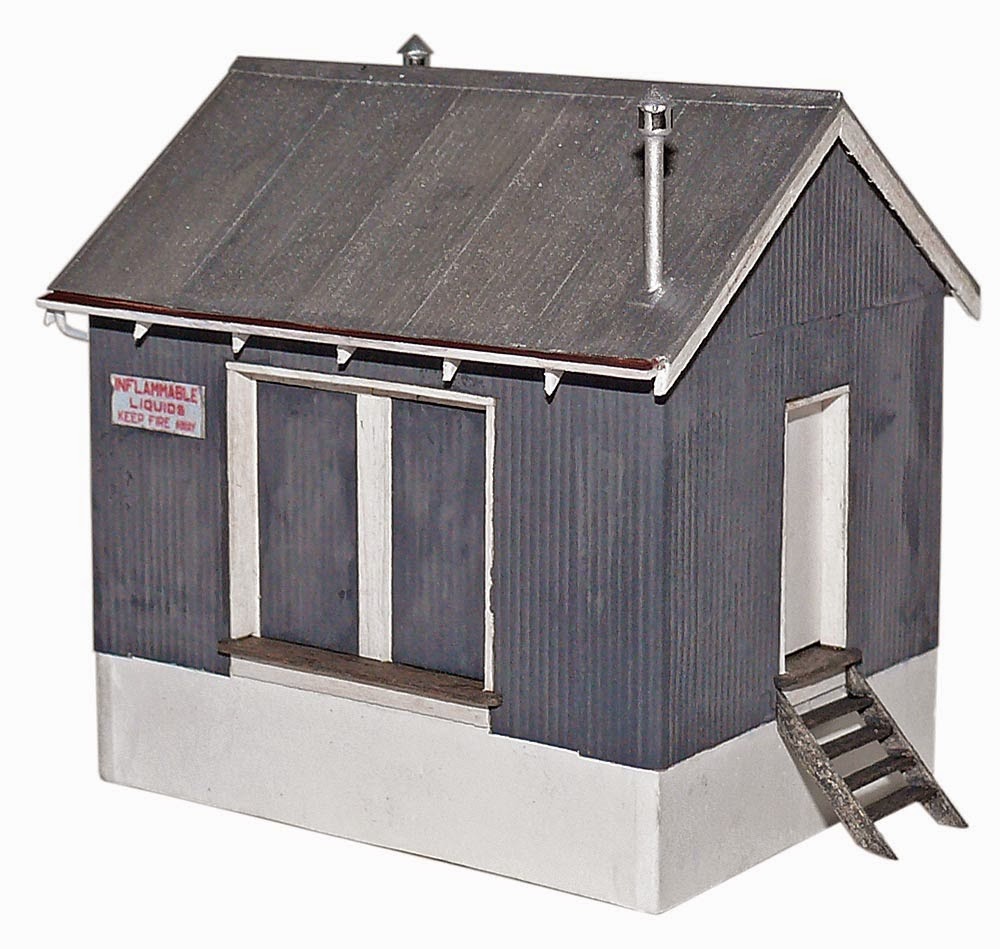
And another ‘long distance’ project, I photographed and measured the prototype of this flammable materials store at Young on 25 August 1983, over 30 years ago! The unknown dimensions of the building were worked out by ‘straightening up’ the 1983 photos of the building in Photoshop, adjusting the size until the known dimensions matched HO scale, then printing it out as a plan. Waiting 30 years to build it has made it a lot easier to build! Construction is card, with a box constructed from thick card with corrugated card glued on top and details scratchbuilt from timber and styrene. The sign is a Photoshopped and printed image of the original.