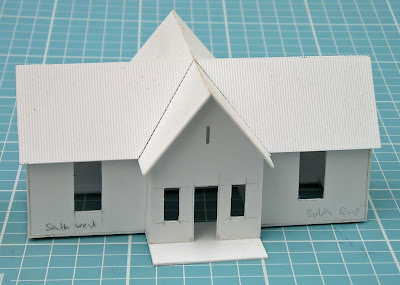
HO model of the Docker Street gatekeeper cottage
Making models out of styrene is an aspect of the hobby I am finding quite satisfying. Not having a kit, or even plans just adds to the challenge. And selection of prototype specific structures, firmly sets the location for the model.
 |
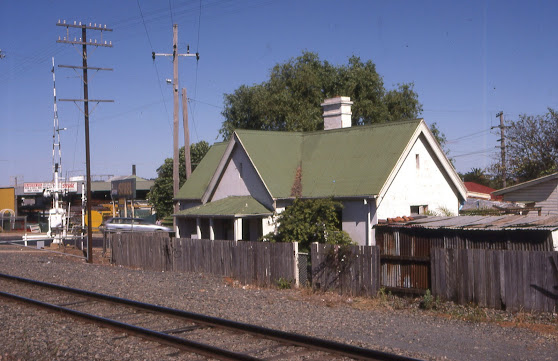
| My picture of the cottage taken in 1997, just after the headshunt track (for the gasworks siding) had been removed |
There are no kits for this design of cottage, but the high peaked roof is indicative of the gothic style used by Whitton for other stations made in the 1880s during the railway’s rapid expansion in NSW. This cottage, and the now demolished cottage at Urana Street had the same basic design, although each got unique additions.
I have more prototype pictures on an earlier blog post
https://buildingwagga.blogspot.com/2022/07/docker-street-gatekeeper-cottage.html
Plans
.jpg) |
| Plans were made from photos, and certain aspects of other buildings I did have plans for. Note, I corrected an error in the roof above from the plans I posted earlier. |
Making the cottage out of styrene
The first stage is the tedious step, and takes a good number of hours – cutting out. I use .040 thou Evergreen brand styrene, which is a compromise with strength, and ease of cutting.
 |
| All main walls. Note the fibro annex off the rear (northern wall) is not shown, nor is there any window or door on the northern wall. |
 |
| Basic assembly, on a base of 0.040 styrene, with cutouts to enable access to the interior after the roof goes on |
Whilst nowhere as complex as Wagga Station, I still have more things to learn. The valleys between the roof gables should include a channel, and my roof method doesn’t make provisions for it. Perhaps filling the valleys with leaves may hide things later?
 |
| Front veranda awning, and slot for the chimney |
 |
| Fibro Annex added – it is loose, as I have made some provision for dropping this lower than the main structure which is something that the prototype did |
 |
| The lower wall of the fibro annex can be seen in this picture. It can be positioned lower |
At this point (about 3 weeks ago), my steady progress stopped, and I didn’t get back to the workbench to work on the model for 2 weeks.
 |
| Windows were drawn and painted on clear styrene with a bow pen for the mullions, and brush for the edges. When dry, these would be cut for each window opening |
 |
| Weathering with pastel rust powder changed the colour of the roof to be closer to the olive of the protoype roof in my 1997 colour picture. But, I probably overdid it a bit. |
After fitting the windows, and doors, the model is now essentially complete. There is always more that could be done (such as switch boards, and outside toilet block), and I will wait final placement on the layout. I could also fit an interior, as the cottage is to be placed on the asile side of the tracks
This cottage will not win any awards, as the painted windows lack the 3D effect. This was a compromise for speed, over fidelity.
Conclusion
Setting a specific location for a layout is a two edge sword. Selection of scenery, buildings, and other prototype features is a simple matter of just observation, has been done for you. However, the downside can be a challenge; locating photos of now disappeared structures and then making plans if none exist increases the sense of satisfaction upon completion.
(I am sorry for the delay in posting – but I didn’t want to finish this post with yet another unfinished building)
Until next time


